REVIEW OF THE ROAROCKIT THIN AIR PRESS
Welcome to the first product review on DIYskate.com.
Recently, the folks over at roarockit.com were kind enough to provide me with one of their Thin Air Press kits for me to review.
I received the kit just before christmas and with the holidays making life hectic, I hadn't had a chance to even open it until yesterday (12-27-08). Since then I have been able to unpack the contents, read over the instructions and go through the supplies.
WHAT IS IT?
What exactly is a Thin Air Press and what does it do. And who are these roarockit people you ask.
Well Roarockit.com is a skateboard company that focuses on allowing you to make your own skateboard deck with the assistance of their kit, the Thin Air Press.
The Thin Air Press consists of a vinyl bag, a manual pump that resembles a miniature bicycle pump and in some kits, a dense hand cut styrofoam mold with veneer. You place the veneer on the mold, put the mold in the bag, suck out the air with the pump and viola! You have a skateboard deck.
Ok, so there's a little more to it than that.
ARRIVAL OF THE THIN AIR PRESS
Roarockit.com sells many different kits but each Thin Air Press kit is similar in the fact that is contains the vinyl bag and a pump. Mine happened to come with the hand cut mold and veneer as well.
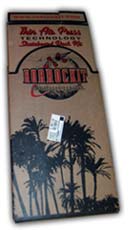
It arrived at my doorstep in a big cardboard box with their logo and some palm trees on the front. When I opened it, I found that the contents were packed very well, and everything that was supposed to be included, was.
The only issue I had, was that the glue had frozen during shipping. Now I live in Illinois and it was very cold this week (below freezing for days), so this wasn't a surprise. However, once glue freezes, it tends to not set up correctly when used. So I replaced the glue with the same kind from a local hardware store.
CONTENTS
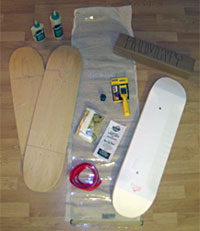
Once unpacked, the Thin Air Press box contained a vinyl bag, a manual pump, a styrofoam mold (the positive side) and enough pre-cut veneer for two skateboards, a total of 14 layers!
They supplied 24 ounces of Titebond III glue in two bottles too, one 8 ounce and one 16 ounce bottle. Which came with a little measuring cup and a glue roller to apply it to the veneer.
Also in the box were two pieces of extra sealer tape for the vinyl bag and breather netting which I will explain later.
They were thorough enough to include some tools as well. Such as a rasp, and some sandpaper to shape and smooth the deck.
THE KIT
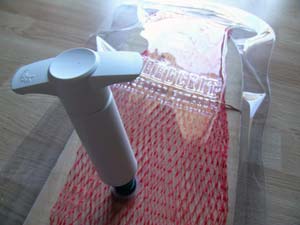
The bag is a 14" wide by 47" long, 20 mil thick vinyl vacuum bag which has a strip of tacky tar like tape at one end to seal it and a one way valve in the center for air evacuation.
The manual pump is a plastic tube with a handle on one end which, when pumped acts like another one way valve. It was originally designed to keep wine fresh by pulling air out of a wine bottle without forcing air back in. Such a simple idea which now allows anyone to make a skateboard for pennies, compared to other pressing options.
The 8" wide by 31" long styrofoam mold that came with my kit is for street decks. It's hand cut with what I assume was a hot wire and jig to form a mellow concave. The whole kit is surprisingly lightweight at under 3 pounds with veneer.
THE INSTRUCTIONS
Now that you know what a Thin Air Press is and how it works, let's have a look at the instructions...
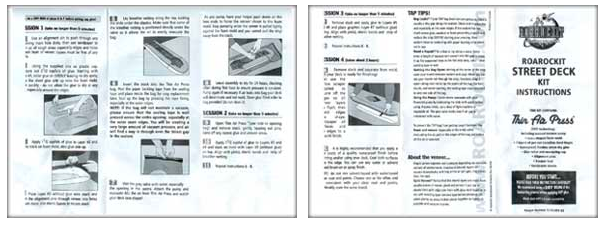
I have got to say, I'm a little disappointed here. Steps 1 through 4 and 12 through 15 were cut off. This was how I received them and not because of my scanning them in. There's also a few things I feel were left out and some grammatical errors. All in all no big deal, I was just hoping for more attention to detail.
Roarockit have since sent me a PDF of the instructions in full. Thanks again guys.
PREPARING TO BUILD
After I had all the pieces sorted, I choose to lay out all the necessary pieces for the first "session" of the build so I wouldn't be scrambling to get what I needed.
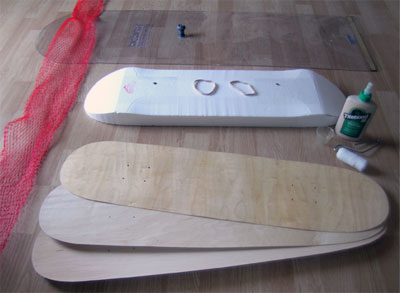
BEGINNING THE BUILD
After I had my pieces laid out, I began to build as the instructions explained.
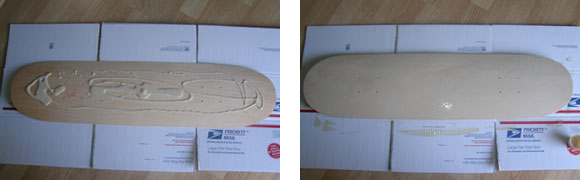
Which starts by having me apply glue to two of the veneer layers and placing a third on top of that.
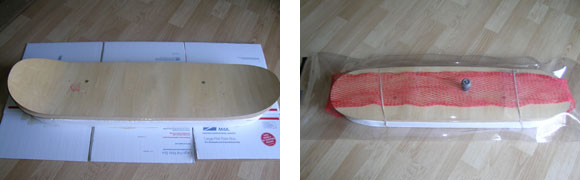
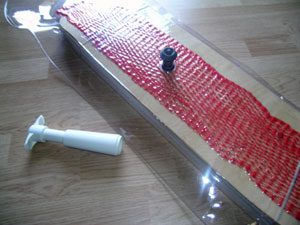
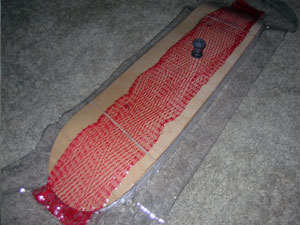
Once this had been done, I put the breather netting on top of the veneer layers. It allows the manual pump to pull out the air inside the bag without the valve getting stuck to the veneer. Now, per the instructions I placed the whole assembly into the Thin Air Press vacuum bag.
Using the manual pump, I vacuumed out the air in the bag. This took about 130 pumps. Once all the air has been sucked out, I needed to allow those three layers to dry for 24 hours.
So far, everything has went as planned and has been fairly easy to do. As a matter of fact, the instructions recommend using two people to complete the build. However, I found it easy enough to do by myself, even while documenting the process for this article.
DAY 2
I didn't realize until I began the build, that you don't place all 7 layers into the bag and press them together. It is done over the course of three sessions, allowing 24 hours between each session to let the glue cure.
On day two after 24 hours had passed and the glue had dried, I opened the bag. By far the hardest part of the build. The tar like tape that keeps air from escaping from the bag also makes it difficult to peel the bag apart... nature of the beast I guess.
Continuing to follow the instructions, I added veneer layers 4, and 5 with glue and placed everything back into the bag for another 24 hours. I was able to re-use the sealant tape from the day before.
Also, just like yesterday, there weren't any problems. This is turning out to be a pretty easy build.
DAY 3
On the third day, just as the two before, everything went as planned. Opening the vacuum bag was easier today too, it must be because I am still using the same sealant strip that it came with.
I'm also down to the last two veneer layers. Layers 6 and 7, which I rolled the glue onto just as the instructions asked me to and placed the entire assembly into the bag for it's final pressing.
I've got to tell you, I am anxious to see how it turns out when I open the bag tomorrow. I am excited!
DAY 4
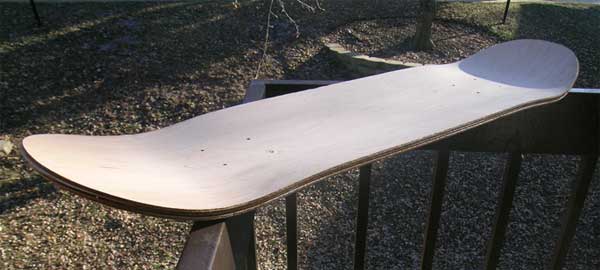
Here we are at the fourth day of the build and I get to see what the final product looks lie. I peeled apart the sealant tape, which is easier each day that it is opened. What I pulled out was an actual skateboard.
It needs to be shaped, but it's almost there. Seeing how it's New Years Eve, I'll save that for tomorrow.
DAY 5 - NEW YEARS 2009
Happy New Year!
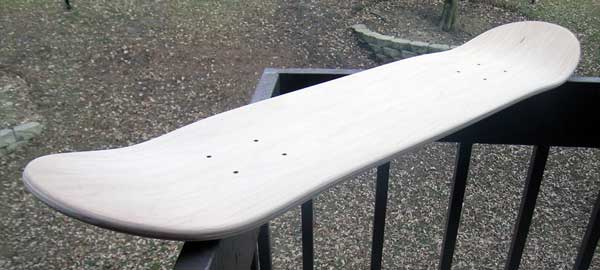
Today I removed the excess wood and sanded it smooth. It's really looking like a skateboard now. I was having some doubts whether it would be as rigid as a regular skateboard, especially on day 3. But no more, I did a couple carpet kickflips on it and it's as sturdy as any professional deck I've stood on.
There is still the clear coat to apply then it's time to skate it and give it a proper review.
I did find that while shaping the deck, I had to sand off about 1/4" inch on each side to clean up the edges. Since the veneer comes pre-cut at 8" wide, I am now left with a 7 1/2" wide deck... way too skinny for my liking. If I were to do this over, I would definitely request the uncut veneer for that reason.
FINISHING THE DECK
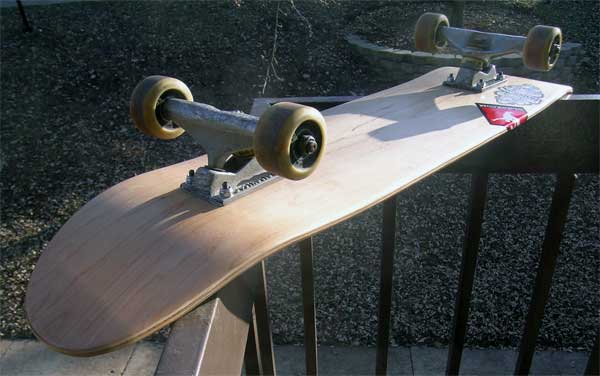
I have finally had a chance to give the deck a few coats of lacquer (clear coat). I also added some grip tape and a couple of skateboard trucks an old roommate gave me some years ago (thanks Blake).
I was surprised that the front and back truck mounting holes on the skateboard and the trucks and hardware lined up on the first try. That's precision.

Since it is still very cold here in Illinois, I'm going to wait until the weekend before I actually skate it. I have rolled around on it and done a few flip tricks just to feel it out though.
Who knew that a regular woodworking glue (titebond III) and a manual vacuum press could produce such an amazing deck.
Update #1: I skated this deck last weekend (1/25/09) at a local skatepark (Krush) and it was great. I was surprised to find out just how much pop it had and how solid it felt too.
Update #2: Hey, hey! I figured I would pop back in and give a few thoughts on this project many years later. 6 years actually. Wow, where has the time went? Well, it's Tuesday, August 18th 2015 and I'm happy to say, this deck still lives on. I ended up giving it to a co-worker for his kid, and that kid still has that deck to this day. Granted, no 15 stair fronside flips are going down, but for a deck to mess around on, I'm very impressed.
FINISHING THE DECK PART II
Remember how I was saying that there was enough veneer for two decks? Well, I decided to make the second a little different than the standard shape.
Think along the lines of the Zip Zinger deck by Mark Gonzalez's company, Krooked. I marked the deck where it needed to be cut and cut it to shape. Everything else from there was the same as the first deck.

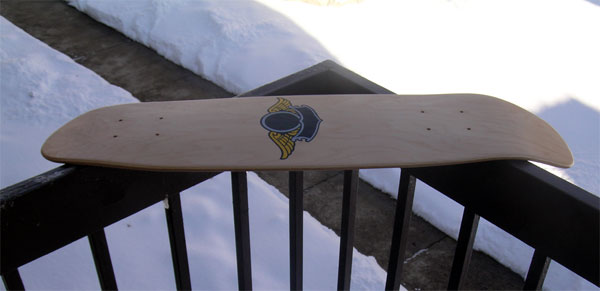
I have finished up the graphics and added the clear coat, along with a custom grip job.
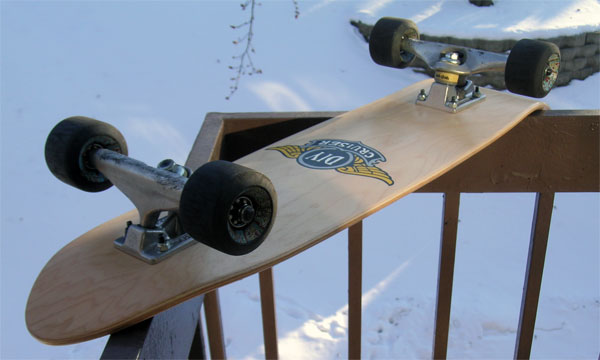
I also added a couple Independent 169's and some bullet 60mm wheels to officially make it a cruiser.
I'm really pleased with the way this deck turned out. Even though I used the same foam mold that was supplied with the kit, I had no problem making another style of deck out of it.
As seen by the snow in the background of these pictures, I haven't had a chance to skate this deck.
Update #1: We had an abnormally warm couple of days for this time of year (2/23/09). So I took the cruiser out and aimlessly rolled around, getting the hang of this little deck. Just like the other deck, very solid, responsive and professional feeling. It was so stable, I decided to even take it to a local downhill spot and hit some 30mph + speeds on it. I spent the better part of the day with this deck and couldn't have been happier, good times.
Update #2: Now this deck on the other hand, I still have it in my possesion 6 years later (8/18/15). I used to bomb some hills with it, even skate some local parks, but it got retired a coouple years ago when I needed the trucks for another cruiser project which I still skate to this day. But that deck is hung up in my spare bedroom with pride and I hope to throw some trucks on it and have it back out cruising some time soon!

CONCLUSION
To be honest, I'm very impressed with the whole build. Granted it takes a lot longer than I had expected, but I am left with two quality skateboard decks. And let's face it, how many places do you know of that sells a complete kit to make a skateboard (or two) for around a hundred bucks? And you can even re-use the manual vacuum press many times over.
Keep in mind though, that this technique for pressing skateboard decks is more of a "getting your feet wet" kind of deal and is not meant as a way to press decks as a business.
Thanks to the Norah, Ted and the rest of the folks at roarockit for making such a kit and supplying it to me for a review, without them this article would not have been possible. Thanks guys!